Wednesday, July 17, 2013

My Kitchen Table and Mismatched Chairs

We had been married 17 years, had 4 kids and still didn't have a table that our whole family could sit around and have food on the table at the same time.  I had been looking for something I wanted, but could never find one that I really liked and that would fit in my ity bity kitchen.  Also I had several friends who had spent small fortunes on new dinning sets only to have a chair break and then find out 1 chair cost as much as the whole set did.  Needless to say I was frustrated with the whole thing.

I decided to do mismatched table and chairs.  This way when a chair brakes I just have to find a new chair, spray paint it and I will have a full set again!  I started checking garage sales, DI, and furniture store close outs to find chairs and a table.  Not long after I started looking we decided to move so the small kitchen space that had limited me in the past was no longer an issue either.  Everything was falling into place when my 13 year old son said he didn't like the idea because it was too weird - teenagers always have to spoil their mom's fun :)

Here are some of the chairs in their "before" looks:


 I had TONS of fun during the painting process, although my husband wasn't thrilled that I tagged the backyard grass with such beautiful colors - he went out and bought me drop cloths to paint on  :)


I used Valspar (Lowe's brand) spray paint.  After doing 2 coats on the whole chair and 3 coats on the seat and top of the back I distressed the chairs, stained them, did a light spray of color and then put 3 coats of gloss spray paint on them.  After 1 year of heavy use only 1 chair has a chip where my kiddos keep hitting it into the cabinet.


2 of the chairs have padded seats that I covered in black fabric.  I was worried about spills soaking in and going sour so I covered the cushion with vinyl then put the black upholstery fabric over that. I am so glad I did this, one of the first days we used our new chairs and we had milk split on a cushioned chair.

I found my table on KSL.com.  It is solid wood and very sturdy.  I bought it for $20 because the paint and stain were in such bad shape and the top of the table needed to be sanded down to get the dents out.  I personally liked some of the dents - it added personality and completely went along with the look I wanted so this was a bonus for me :)

Before:


After:
I used black spray paint, distressed the table, stained it, and put several coats of gloss sealer on it.


And my finished product!
 

The set wouldn't fit in my old kitchen so I was very excited to get it in our new kitchen and see everything together.  My oldest son was so funny when we were packing.  He asked if we could wrap the chairs in black plastic so no one would see the chairs.  When I asked him why he said that our new neighbors would see them and think we were weird because our chairs didn't match.  (Trying not to laugh) I told him that it was ok if they saw that we had mismatch chairs because then they would know we were weird before they met us and we wouldn't have to try to be normal.  He didn't think my response was funny and he rolls his eyes every time someone says how much they like our table and chairs.

I love how the table turned out, but the best thing about doing it this way is the whole set, with spray paint, sand paper, stain, and sealer cost under $110.00!

Of course a table like this has to be tied into the room.  In order to do this I have kept the walls neutral and added the orange, turquoise, and purple accents around the kitchen with black as a neutralizer.  Here are a few pictures of how I have incorporated the colors.

I love to decorate with family pictures.  I already had these pictures from my other house so
I painted a few of the frames in the colors and left the rest black.
I had an old table from my Grandma that was falling apart so I pulled the doors off,
spray painted them and hung them on the wall.
 I found these at a garage sale and had to have them!
My Grandma had a pair when I was little and these remind me of her :)
I painted them purple and distressed them.
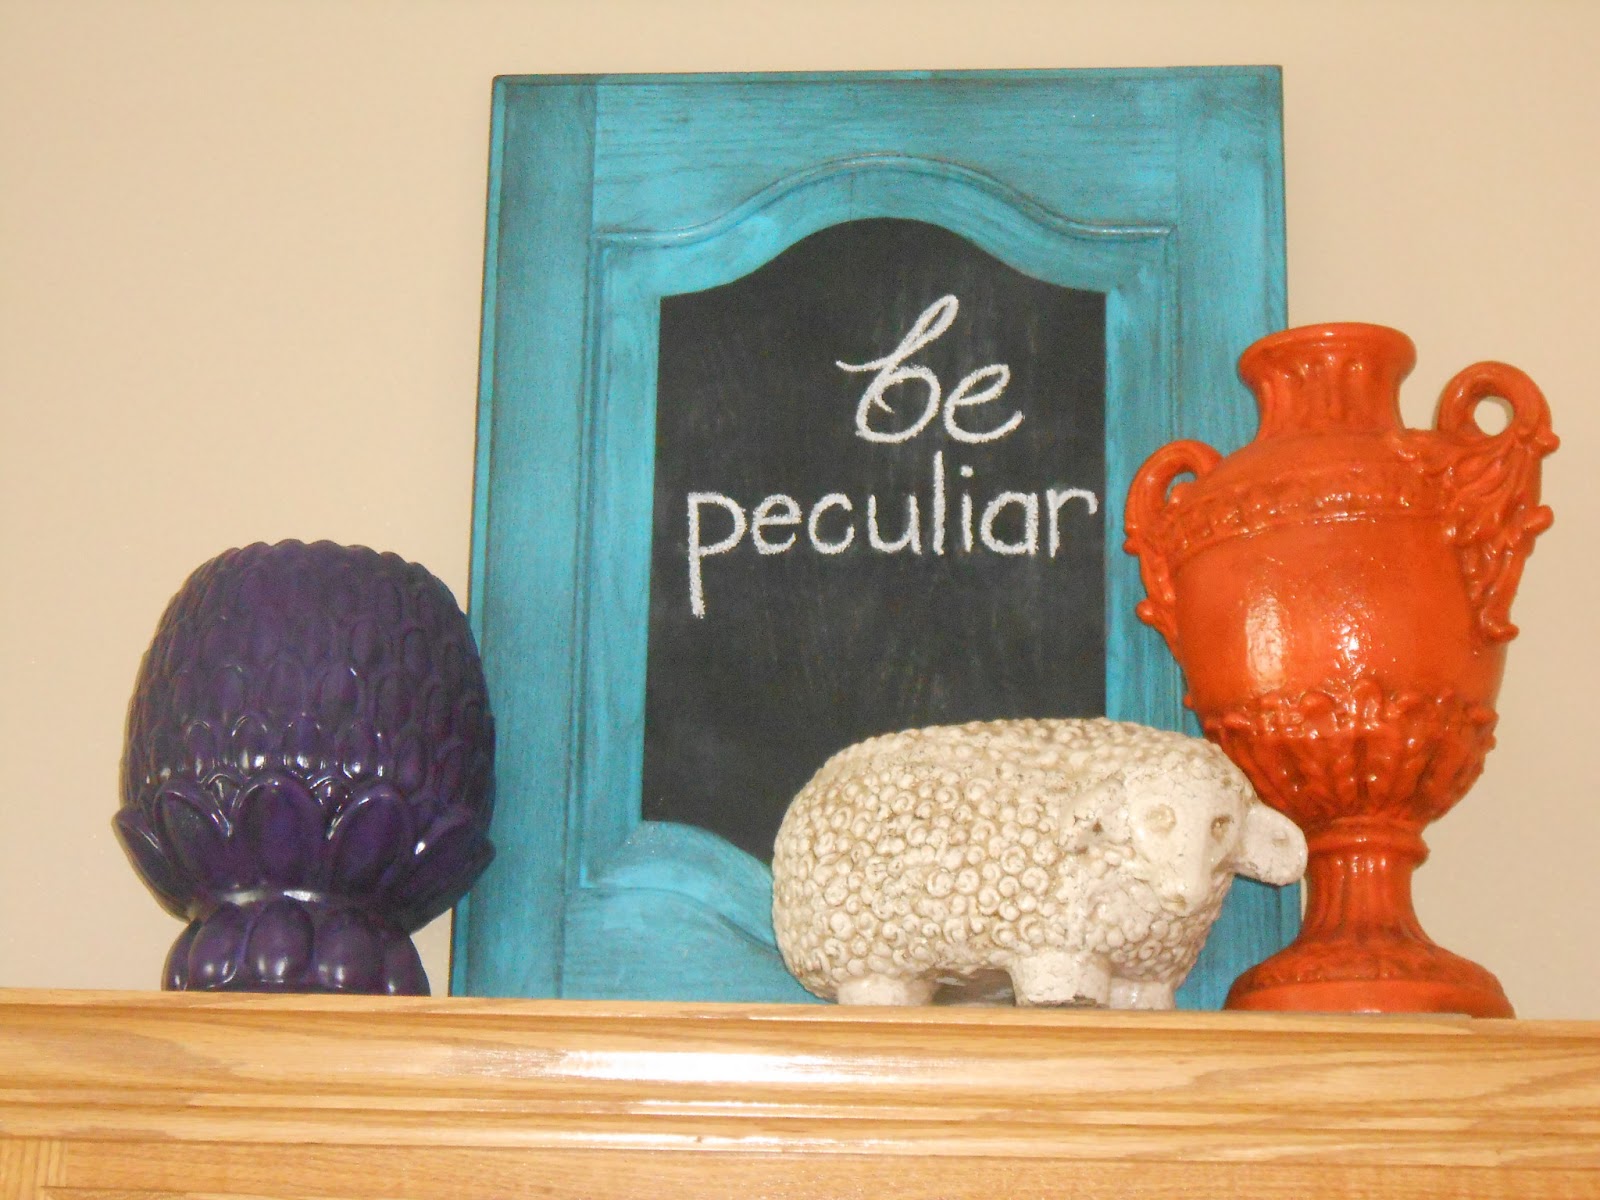
 I made this out of an old cabinet door and painted the rest of the items
to match my colors.  I'm hoping my kids will know that it is ok to be different.
 The owl is outdoor decor.  I painted both of these and I am currently
looking for something to paint black to put up with them.
 These two came in the right colors so I didn't get to use 
spray paint.  The lamb is the cookie jar my mom had when
I was little - I love the little reminders of family all over the house.
 I put this by our back door hoping my kids will read it often 
and remember it always.  I painted the frame to match the room.
 I was having so much fun matching everything that I thought I needed 
matching dish cloths.  I crocheted these out of cotton yarn.  They are the best
dish cloths I've ever used - stylish and useful :)


As you can tell I LOVE spray paint!  It's so fun to see things transformed by something as easy and inexpensive as a can of spray paint!  Just be patient!  I've had to do lots of fixing because I was too anxious and ended up with runs in the paint :)


Luau Birthday Party

My 11 year old daughter has been planning her Luau Birthday Party for months.  We have thrown a few luau parties for our old ward and at their elementary school so she had TONS of ideas.

First off was the invite.  She really didn't have anything in mind so we started drawing.  The more we played with a design the more she liked having different layers.  She really liked having a hibiscus flower and the word LUAU on it and we both thought it needed a hula dancer.  I was able to create a hula dancer using a figure off the Rock Princess Cricut Cartridge.  I had to move the arms and add a grass skirt but it came together perfectly.  After we made the hula girls, we screen printed the hibiscus flower on the front of the cards.  I made a stencil for the flower using my Cricut and the Sure Cuts software.  Then we made our own rub on letters for the "LUAU".  These are lots of fun, but have to be cut out very close to the image or they leave a shiny halo where it wasn't trimmed.  We bought the rub on paper at Hobby Lobby.  It was a little pricey but that is what coupons are for :)


Crafts and Activities

My daughter is very artistic and crafty so of course she wanted to make flower leis, flowers for their hair, bracelets, sarongs....  She had a humungous list!  We narrowed it down to the flower leis and a flower for their hair.  The leis were simple, we bought shell necklaces (from Zuchers) and dollar store flowers (we lucked out and they had good looking Hawaiian flowers!)  We took the flowers off and hot glued ribbons to the back so the girls could tie the flowers on their shell necklace.  It was a simple craft but turned out very pretty.


The hair flowers were a little more time consuming. We wanted them to be attached to a headband so I made braided headbands out of an old brown t-shirt.  They turned out very cute and had just enough stretch to be comfortable for different head sizes. 

 I also pre-cut flowers out of bright cotton fabric.  I did 3 different sizes in 6 different colors.  I pre-washed some of the flowers so they would be frayed and curled, this gives the flower a worn look and is really fun.  The girls were able to choose between the colors, sizes, and frayed/not frayed flowers.


We put a button in the center, added some burlap ribbon or twine and attached them to the braided t-shirt head band. 


They turned out super cute and several of the girls have worn them to church and school - I love to see our party favors being worn after the party!

We had planned on making sarongs for the girls and letting them use bleach pens to decorate them or having the girls tie dye them, but we ran out of time.  The dollar store near us had "grass" skirts so we bought 1 for each girl and they worked great.  Don't underestimate what you can find at the dollar store, they really came through for me on this party!

For the activities we asked a friend to come teach the girls the Hookilau and they played limbo.  We had planned to have a fire but the rain came just in time for the hula lesson and everything was moved indoors.


Decorations

The decorations were much easier for this party.  Since I have done several Luaus on very large scales I have tons of grass skirts for serving tables, sarongs and other Hawaiian print fabric for table cloths, lit palm trees, tiki statues ....  you get the idea.  Anyway, I made surf boards out of large poster boards and spray paint to hang around the yard.  I made a stencil of a hibiscus flower and a turtle.  We had 4 surf boards of each style - stripe, flowers, and turtle - in several different colors.


I was able to find paper lanterns with lights in them at the dollar store and we have several tiki torches that we scattered around the yard.  It looked very fun until it started down pouring but we were able to move most everything under the patio and into the house.


Food


We had Hawaiian pork, rice, tons of fruit and Hawaiian sweet bread for dinner.  I cook the pork loin in my crock pot on low for 12+ hours in pineapple juice - it comes out very moist and falls apart.  After shredding it I put it back in the crock pot and add sauce.  The sauce is 1 part Minors Sweet and Spicy Plum sauce and 2 parts pineapple juice.  This is a family favorite.  


My husband found the recipe for the Hawaiian sweet bread the day of the party.  I had planned on making some, but just hadn't found a recipe that I liked.  This one was simple and tasted almost exactly like the bread we had when we went to Hawaii.  
Here is the link for the recipe  http://www.tasteofhome.com/recipes/Hawaiian-Sweet-Bread?vm=r


Her cake was fun, but I'm still trying to master the marshmallow fondant so it's not perfect.  Next time I will get cookie cutters in the shapes I want instead of free hand cutting them.  These turned out ok, but up close you could see all my cutting mistakes.


I was craving pineapple upside down cake so I made one of those too.  We were sharing cake with our neighbors after the party :)


It's always fun to have a little taste of the islands, the guests had fun, and most important my daughter was thrilled with how everything turned out!


Thursday, May 2, 2013

Kitchen Magnet Board

I was frustrated with how the front of my fridge looked.  With 4 kids the homework clips were out of control, then you add the important phone numbers, wedding invites, baptism invites, birthday party invites....  You know all the "important" things you don't want to forget.  Unfortunately most of my "important" reminders were hidden under other "important" reminders only to be rediscovered a few days too late.  So when we moved I was determined to be organized.

By the door to our garage there is a very tall wall that was screaming to be covered.  I had some left over sheet metal that my husband cut for me, I sectioned it off so there was a space for the family, each child and our weekly menu.  I used a Sharpie paint pen, masking tape, and stencils I made with my cricut to make all initials and weekday names.


Our family section has emergency phone numbers, family invites, etc.  Each of my kids has their own section.  They keep their homework, party invites, activity calendars, pictures... in their own section.  Most of the time it even looks organized!  :)


The menu part of our magnet board is my favorite part.  It makes it very easy for the kids to help me plan our weekly menu.  They enjoy writing down the menu and now I don't get asked a million times what we are having for dinner - it's wonderful!


I used masonite for the menu chalk boards.
I cut the masonite to 2 1/2" x 7" and spray painted them with chalk board paint.

Then I hot glued magnets to the back.
 
This has helped me stay on top of homework, parties and preparing dinner before 8:00 at night :)

Wednesday, May 1, 2013

Cabinet Door Chalk Board Decor

One of my friends found a bunch of unfinished cabinet doors and was kind enough to give me one.  I was so excited for my new project I forgot to take pictures of each step - blogging is new to me, hopefully I will get better :)


I spray painted the door turquoise then sanded and stained the edges - I LOVE the distressed look!  I sealed the door with a clear spray paint, then I taped off the outside edges of the door leaving only the raised center part exposed.  I sprayed the center of the door with chalk board spray paint.  I put at least 5 coats of the chalk board spray paint because I wanted most of the wood grain to be hidden.


This was a quick project.  Most of the time was spent waiting for the paint and stain to dry.  I love how it looks on top of my cabinets and I can easily change my saying.

Wednesday, March 20, 2013

My Craft Room Chair

I saw a chair on Pinterest and have wanted to do something like it for almost a year now.  Here is the link to the chair that inspired my chair  http://roadkillrescue.net/2012/05/doily-design-chair/

Before


I couldn't find any lace that I liked enough (I can be very picky), so I used my Cricut to cut swirls (Accent Essentials cartridge), flowers (George Basic Shapes cartridge), and dots.  I taped the shapes down so they wouldn't move while I spray painted.


This is right after I spray painted.  I use Rustoleum or Valspar (Lowe's spray paint)


I wanted a little pink on the chair to match my craft room.  I dry brushed pink acrylic paint around the design.


I distressed the edges of the chair.  And sealed it with a gloss spray paint.  I only use Valspar clear spray paint for the sealer and I do 2 coats on the entire chair and 3 on the seat.


I only had permanent tape when I taped the shapes down so it was difficult getting all the tape residue off the chair, I would suggest using a repositioning tape instead.  Other then that the chair was done pretty quickly and it looks great in my craft room.

Friday, March 8, 2013

Alice In Wonderland

For my daughter's 9th party she wanted an Alice in Wonderland party.  She LOVES to plan parties and started been planning this in the summer.  Normally she decides the theme and a general idea of what she wants to do and I get to make it happen, but this time she had some very detailed requests. 

Invites

She couldn't pick just 1 thing to have on the invite so we did them all.  We used blue paper to represent Alice and I used my Cricut to cut out everything else - luckily I have the software that lets me make my own svg pictures so I was able to make a Cheshire Cat, watch, and Mad Hatter hat.  I used the Cricut Flower Shoppe cartridge for the Dandi-lion.


Decorations

I had so much fun getting the decorations together for this party!  She wanted to play croquet with the Queen so of course we had to have a room decorated for the Queen of Hearts!  


 This is how I made the big cards for the walls:

I cut a heart, an A, a 2 and a 3 out on my Cricut and traced them onto a poster board to make my patterns. 


 Once everything was traced I used a utility knife to cut them out - this gave me a stencil.


  Next I got to spray paint!!!


My finished product  :)


She also wanted to make a craft with the flowers and have a Mad Hatter tea party.  I ran out of time to make all the decorations for 2 separate rooms so we combined the rooms.  I decorated the walls with balloon flowers and some wide crept paper.  For the ceiling I hung purple (my daughter's favorite color) plastic table cloths, balloons and some paper lanterns that I had made.  I covered the table with purple plastic for the craft and black table clothes for the tea party.  All the chairs were covered with white and cream material and brightly colored ties.  For the tea party portion of the party I used glass candy jars as center pieces - this probably wasn't the best idea since I had planned on it being given out at the end of the party not snacked on throughout the entire night  :)


She also wanted the signs they have in the Disney cartoon version of Alice in Wonderland.  I used poster board, my Cricut to cut out the words, and ink pads to smudge the edges.


Game

She wanted to play croquet but with several girls coming we had to make it into a relay race.  First we had them climb down the rabbit hole.
My husband made 2 rabbit holes out of PVC pipe, rope, and sheets.

This is the PVC frame.  We tied  rope across the sides and top, then covered it with a sheet.
Next they had to play a short game of croquet.


And last they had to feed the Cheshire Cat.


My daughter wanted us to use heart shaped bean bags for this part of the game.
My adorable niece  :)

This is what the room looked like.


Crafts

She wanted each of her friends to get a small top hat to decorate.  I was able to sew 4 hats out of 1/2 yard of fabric and I used the plastic mesh to give it structure.  We kept it simple and had the girls pick a trim to put around their hat.
 
The birthday girl

My 10yr old daughter

We also made bracelets.  Again I used the plastic mesh, covered in gray yarn with 4 buttons sewn on.  The girls cut flowers out of felt and we cut button holes in the flowers so they could be attached to the bracelets.


Food

For the Mad Hatter's tea party she wanted each girl to have their own tea cup - my mom and sister helped me find enough for each girl to have one to keep.  She wasn't interested in small, tea party food instead we had pizza rolls, jello, bread sticks and hot cocoa (in the tea cups).

Our version of pizza rolls


For dessert we had ice cream in cookie bowls (I didn't get a picture of these) and cake.  She wanted a fun crazy cake so this is what I came up with.  Please don't look too closely this was my first time making and using marshmallow fondant (which is so much fun!  Now I try to find a reason to make a fun cake).


This party was so much fun!  But I couldn't have done it without my amazing friends and family.  I always get a little crazy on "party day" and so many of my friends and family just showed up to help.  My husband says they came to help him deal with me - either way I love to have them there.

My daughter was thrilled with how it all turned out 
and is currently planning next years party :)